Getting Started
Get started by downloading the Simkey App from the simkey-app GitHub releases (it is currently only available on Windows). We will go through how to use the app and briefly mention the VS Code extension (Simkey Highlighter).
Using the Simkey App
First create a .simkey file with a basic script. We will be using this file for our demonstration (calling it abc.simkey):
<SETTINGS> # This will be read by the app when loading #
    name = "My First App!"

<MACRO>
    abc # Clicks a,b,c and releases #
The code under <SETTINGS> is just information about the file. For more on the <SETTINGS> section, visit this page
Getting the File to Load
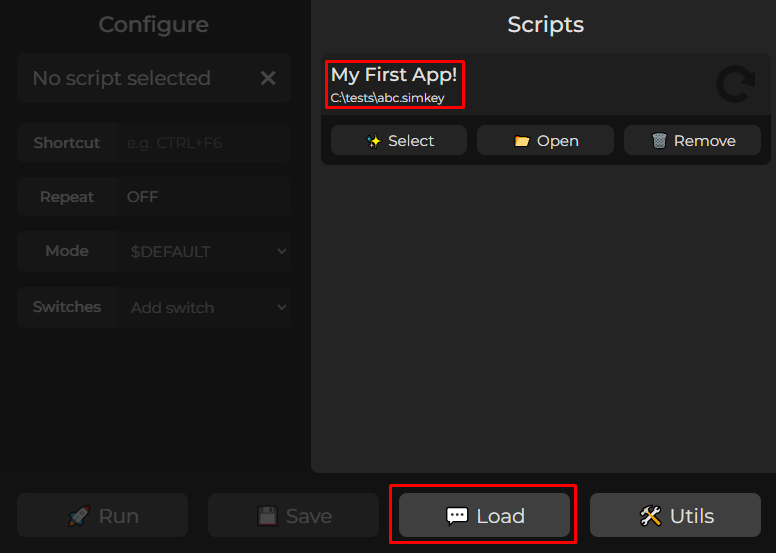
Save this script under abc.simkey and press the Load button (in the bottom strip) in the app. This will open an explorer window for you to choose the script. Once loaded, you should notice that it is named My First App!, with the path to the file located under that.
Here's the load button, location, and name circled and how the app should currently look:
Now press the Select button you find under the script name and location. You should see the Configure section enable and light up, and notice that now the Run and Save buttons are enabled:
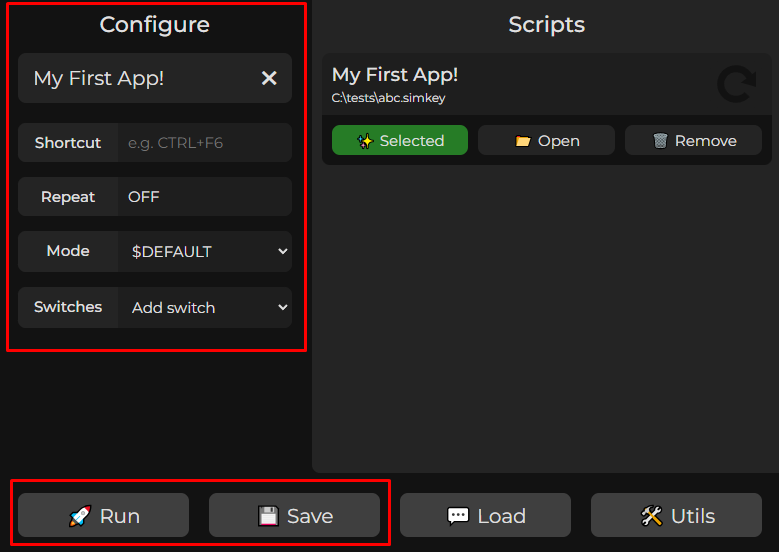
You can exit out of this by clicking the X next to the name on the Configure section.
In the configure section, you can add a shortcut, how many times you want the script to repeat (positive integer, ON, or OFF which is the same as 1), which mode is selected when compiling, and which switches are on when compiling.
You will learn these concepts later in the docs (such as what a mode and switch is), just be aware that this is how you manipulate them within the app.
To open the file with its default editor, you can click the Open button in the script's box. Clicking Remove will remove it from the app, and will not delete the actual file.
Whenever you make a change to the file, this will not be automatically registered in the app, as it runs off of already compiled files. In order to get it to recompile, press the reload button on the right of each script's name.
Testable Example (Autoclicker)
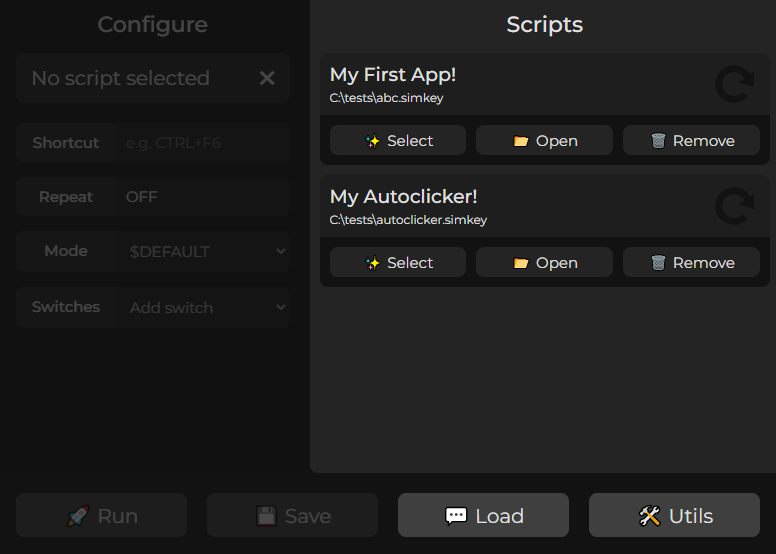
With the previous example, it is hard to test the effects yourself. When you click Run or use a shortcut, the script instantly executes and there is nowhere for abc to be written. We will be using a different example, which is making a simple autoclicker:
<SETTINGS>
    name = "My Autoclicker!"

<MACRO>
    [MB_LEFT]<25>
Follow the steps above in order to get here:
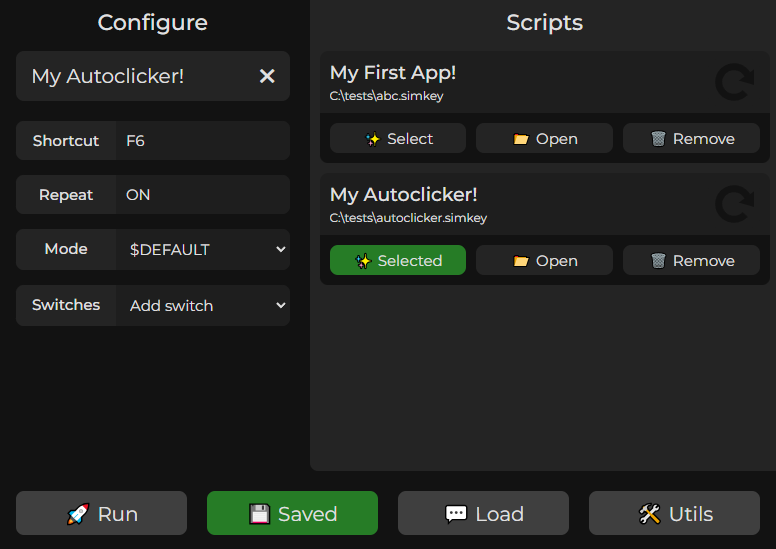
This time, we will configure a shortcut for ease of use. Go ahead and press Select, then set the shortcut in the configure section to F6. Set the Repeat to ON, as we want this to only stop when you press the shortcut. Finally, click Save.
To test this, go to a click speed test website, such as CPSRace, and give it a go with the shortcut!
When setting a shortcut or adjusting the repeat, the app automatically saves when you press enter or click off the input. However, when changing modes and switches, or the inputtable vectors, the script must be recompiled, so you must press Save.
Improved Autoclicker
The last example does not give you any control over what the script does from the app. It only allows you to decide how many times to repeat the script, and what shortcut to set. We can do better.
For this example, we will be creating an autoclicker that gives you the same functionality as OP Auto Clicker, a popular autoclicker. You can choose which mouse button to click, whether to double-click, keep the cursor in a specific position while clicking, and set a custom delay.
Here's the code we will be using:
<SETTINGS>
    # Some metadata that will show up in the app #
    name = "OP AUTOCLICKER"
    mode = $LEFT_CLICK
    repeat = ON


<MODES>
    # Modes for which mouse button to click #
    $LEFT_CLICK
    $MIDDLE_CLICK
    $RIGHT_CLICK


<SWITCHES>
    # Options we will have for the script #
    $keep_cursor # Keeps cursor in the position given ($cursor) #
    $double_click # Double clicks each time #


<VECTORS>
    # Vectors that will be customizable within the app (because of | input) #
    $delay = 100 | input # How much we wait between clicks #
    $cursor = 0,0 | input # Position to keep the cursor in (if $keep_cursor is on) #


<FUNCS>
    # Function to handle clicking, whether or not $double_click is on #
    @click {
        @click_chosen
        @if $double_click { @click_chosen }
    }

    # Function to click the right button depending on the mode #
    @click_chosen {
        @if $MIDDLE_CLICK { [MB_MIDDLE] }
        @elseif $RIGHT_CLICK { [MB_RIGHT] }
        @else { [MB_LEFT] }
    }

    # Function to either move the cursor or do nothing depending on $keep_cursor #
    @move_cursor {
        @if $keep_cursor { @cursor [$cursor] }
    }


<MACRO>
    # The main code #
    @delay [0,0] # Set to 0,0 to avoid any other delays #
    @move_cursor # Handles moving cursor #
    @click # Handles clicking #
    <$delay> # Wait $delay milliseconds #
You can save this under the previous file for the autoclicker and press reload within the app, or make a different file for it and load it. Once you have loaded the file, press Select under the script.
Notice that this script has additional inputs in the configure section! This is because of the | input included next to the vector values in the script. These inputs will allow you to set the corresponding values for $delay and $cursor.
If you press on the Switches dropdown, you'll see two options: $keep_cursor and $double_click. Try to look at the code to see what those do—it is written in the comments.
In the Mode dropdown, you'll see that there's options for left, middle, and right clicking. Configure the script to your liking, add your own shortcut, and give it a go!
Utilities (Utils Button)
The final thing is the Utils. You can click the Utils button in the bottom right, and a window should open.
This currently only has one button which you can click to track where your mouse goes. By pressing enter while not having clicked off the Utilities window, you can click the button and have it stop to record where your cursor was (can be helpful for @cursor). We plan to add more helpful utilities later on.
Setting Up Highlighting
If you use VS Code, you can download the Simkey Highlighter extension from the marketplace. You can also visit the simkey-vscode GitHub repository to download releases from there.